Taking good photos with a smartphone has never been so easy. Cell phone cameras, free photo editing apps and a little patience are all you need to prepare intriguing photos that will entice visitors to your room.
Table of contents
We will tell you, step by step, how to go about it, so as not to reveal everything hidden in the room, and at the same time create an interesting photo showcase of your ER.
Even if you are not a master photographer - do not worry. Smartphones offered on the market today are highly advanced machines for taking photos in even the most difficult conditions. The photos they take are the result of the seamless cooperation of two or even three lenses, built into the device. Added to this is the artificial intelligence, which takes care of the settings for the photographer, giving the best quality photo, choosing the optimal mode, light, etc.
Interestingly, the "auto" mode in smartphones works much better than in traditional cameras. So there's no need to delay any longer, wondering whether to hire a photographer, buy a DSLR or order professional visuals. Get on with it!
Rule one: choosing equipment
To begin with, a little about equipment. Often in my training sessions, the question comes up: do apple phones take better pictures than other leading brands? They don't. All high-end models offer similar capabilities, and differ only in details. For ordinary users, expecting smoothly functioning equipment, taking good quality photos in difficult lighting - it is unlikely to matter much.
If your phone model does not take good pictures - you do not need to buy a new one. First read our guide on how to take ER photos and how to process them in simple graphics programs, and if you are not satisfied with the result despite your attempts, borrow a phone from a friend or girlfriend. You may be able to take a better photo with another phone.
Rule Two: Composition - tri-partitioning
Tripartition is the basic principle and "secret" of how the human brain perceives a given photo as correct, natural, just good.
When setting up the frame, focus on making it divided by invisible lines: two vertical lines and two horizontal lines, which will give you four points of intersection, the so-called "strong points of the image." They naturally attract the viewer's attention, so important elements are good to place in one of these four points.

Just remember to avoid placing the most important element in the center of the frame.
Rule three: details not the whole thing
Escape rooms can be difficult to photograph, due to the usual twilight in the room. Using additional lighting, or flashes - can be troublesome for a number of reasons. Apart from where to get such equipment (if you don't have your own lamps, tripods, etc.), there is also the issue of rendering the atmosphere of the room in the photo. Illuminating, for the purposes of a photo shoot, a deliberately darkened room - you are more likely to get the opposite of the intended effect.
And after all, the photo you want to use as a showcase of the room should have good sharpness, illumination and be free of the "grain" effect. Part of the job modern smartphones will do for you. In addition, when photographing the ER, we recommend focusing on the details. Don't show the whole room. Choose its most important, most photogenic elements. Look for a narrow frame (that is, don't stand in the corner of the room to capture exactly everything in the photo), which will include a single motif of your choice. A piece of the room. Narrow composition.
Remember that the camera lens behaves differently than your eye. It does not focus on a single element, "forgetting" all of its surroundings. The lens will dispassionately capture everything around it. Therefore, it is easy, when photographing an entire room, to introduce chaos and make even a multifaceted room full of secrets become just a collection of furniture and furnishings.
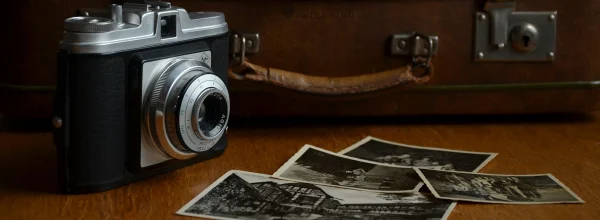
Below are a few photos of details from the Escape Time rooms we visited in Gdansk, Poland. See, even though they don't show much at all, they do a great job of capturing the atmosphere and evoking emotions such as a bit of terror, curiosity and even evoking associations with a movie. Such a room immediately makes you want to visit!.jpg)
Rule four: tricks to take better photos in ER
1) Turn on the grid lines in your camera (you can find them in the camera settings) - they will help you see if what you want to photograph is in the strong points of the photo.
2) Frame photos taken earlier - you can crop any photo taken earlier - so that you remove what is unimportant from the frame, and place the important element in one of the four strong points.
3) Don't use your smartphone's built-in flash! It's best to permanently disable it so that it never accidentally surprises you and ruins a photo. The flash on a smartphone works best as... a flashlight;-)
4) Do not use digital zoom, instead of zooming in digitally - get as close to the subject as possible. Zoom destroys the image quality a lot.
Take pictures from a close distance - the closer you get with the camera to the illuminated object, the better our smartphone will choose the optimal lighting parameters.
5) Focus on the selected detail - by touching the selected object with your finger on the smartphone screen, we will make the smartphone sharpen the image on that particular item.
Rule five: improving already taken photos
A good photo can be made even better. There are thousands of better and worse photo editing apps for phones. We'll focus here on one basic one and list a few others that we think you should start with for photo post-production. All apps are free and are available for both Iphone and Android phones.
Snapseed
A free app from Google, which has been in development for years, giving a sizable array of options for editing and post-production of photos on smartphones. It offers a lot of options, not only in the field of image parameter correction. It also works well as a tool for basic graphic work. It is available in Polish.

Among the many very useful options are:
- correction of brightness, contrast, atmosphere, overexposure, shadows
- possibility to superimpose text on the photo
- double exposure (assembling an illustration from two superimposed images)
- striking styles to apply
- possibility to turn up the drama of the composition
- correction of perspective ( in the picture above)
- fixing, among other things, erasing small, unnecessary elements from the frame (in the photo below)
- ability to work selectively on the file (we can edit a selected part of the frame, e.g. brighten only a selected element in the photo).jpg)
In addition, Snapseed, like no other such application, has a "tutorials" section, which contains a very wide selection of accessibly given advice from professional photographers on how to achieve various effects using this very application.

Below are examples of photos after a slight alteration in Snapseed.
Other smartphone photo editing apps worth trying include:
VSCOcam - a free app, with the possibility of buying additional filters
Photoshop Express - a lightweight, mobile version of the most popular photo editing program
Lightroom - a mobile version of the post-production program (some features free)
All are available for both iOS and Android.
Rule six: experimentation
An interesting idea to use - from time to time, e.g., for a post on FB - is the Boomerang app, which offers quick and very easy production of animations of a few seconds. The use of Boomerang can sometimes liven up, make your room's promotional materials more attractive. Especially if you have built the atmosphere in it with remarkable lighting.
As everywhere, also here, the most important thing is the idea - before you make a gif, think for a moment what idea you have for a frame, shot, animation. Simply - what do you want to convey to the recipients, what emotions to evoke.
You can find the Boomerang app in both Android and Iphone versions.
And that would be it. We hope that at least some of the above comments will be useful to you when you are taking pictures.
Adrian Werner - co-manages IgersGdansk - a Pomeranian community of photographers who publish and are active on Instagram. He organizes events where mobile photography "plays the first fiddle", takes photos, makes videos, conducts workshops and teaches how to take better photos with your phone.